
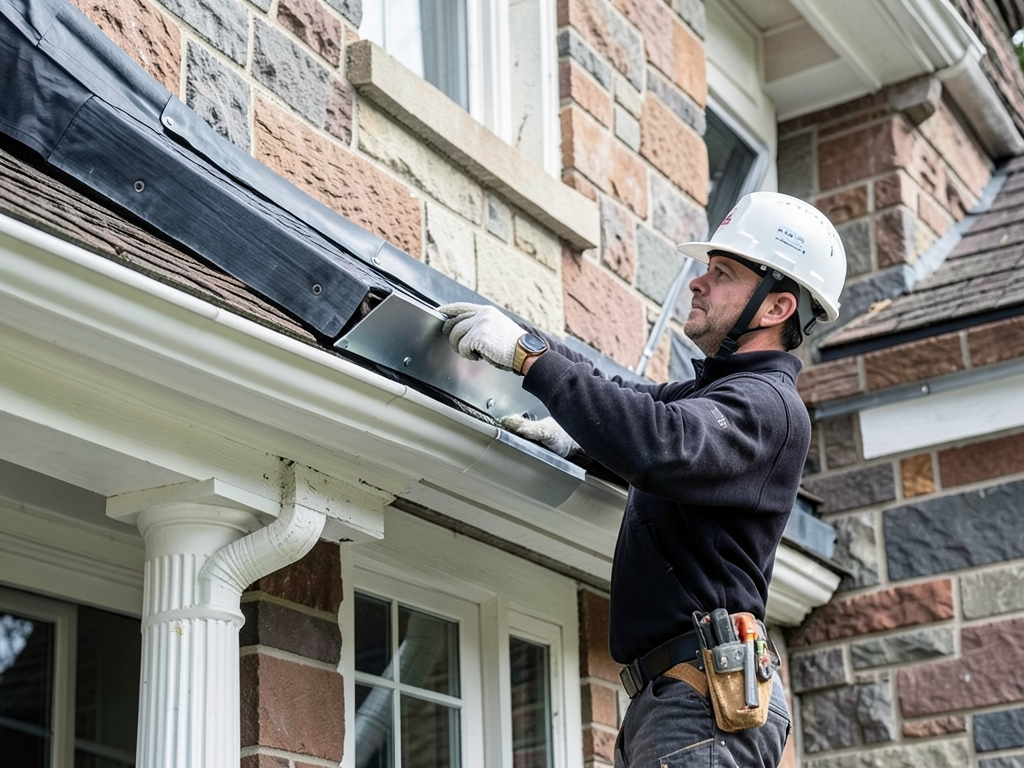
Why kickout flashing is the one thing standing between your Cooper-Young bungalow and major water damage
Water damage in Cooper-Young bungalows often starts at the roof-to-wall intersection where kickout flashing should be. This small but critical component diverts water from your roof into the gutter instead of letting it cascade down your siding. Without proper kickout flashing, water infiltrates behind your stucco or brick, causing rot in your wall sheathing and creating perfect conditions for mold growth in Memphis’s humid climate. Storm Damage Roof Inspection and Repair in Bartlett.
The problem is especially acute in Cooper-Young’s historic homes built before modern building codes required kickout flashing. Many of these charming bungalows have already suffered hidden water damage that homeowners only discover when they notice peeling paint, soft spots in walls, or musty odors in their living rooms.
Memphis receives an average of 54 inches of rainfall annually, with heavy thunderstorms common from March through September. When water hits your roof at the wall intersection without kickout flashing, it follows the path of least resistance—often behind your siding where it can cause thousands of dollars in damage before you notice anything wrong.
How kickout flashing protects your Cooper-Young home
Kickout flashing, also called a diverter flashing, is a small metal piece that extends from your roof up the wall and then kicks out at an angle to direct water into the gutter system. Think of it as a tiny water slide that prevents rain from running down your wall and into your home’s structure.
In Cooper-Young’s older homes, the absence of kickout flashing is particularly problematic because:
- Many homes have stucco or brick veneer siding that hides water damage until it’s severe
- The neighborhood’s mature tree canopy means more debris in gutters, causing overflow
- Older construction often lacks proper moisture barriers behind siding
Without kickout flashing, water penetrates the wall assembly, saturating the sheathing and creating an environment where mold can grow within 24-48 hours in Memphis’s warm, humid conditions.
The diagnostic process: finding hidden water damage
Professional roofers use several diagnostic tools to identify water damage in Cooper-Young bungalows: Residential Roofers Specializing in Historic Homes in Central Gardens.
- Moisture meters to detect elevated moisture content in wall sheathing
- Infrared cameras to identify temperature differences indicating moisture
- Visual inspection of the roof-to-wall intersection for missing or damaged flashing
When we inspect a Cooper-Young home, we often find that the damage extends beyond the immediate area of the missing kickout flashing. Water can travel horizontally through wall cavities, affecting multiple rooms and potentially compromising electrical wiring and insulation.
Memphis building codes and kickout flashing requirements
The Shelby County Unified Development Code now requires kickout flashing at all roof-to-wall intersections where water runoff could contact a wall. This requirement aligns with the International Residential Code (IRC) R903.2.1, which mandates proper flashing at these critical junctions. Shelby County Construction Code.
For Cooper-Young homeowners, this means:
- Any roof replacement permit requires inspection of existing flashing
- Insurance companies may deny claims for water damage if proper flashing was not installed
- Historic district guidelines may affect the materials and methods used for flashing installation
The Memphis-Shelby County Construction Code requires that kickout flashing extend at least 4 inches up the wall and project far enough to direct water into the gutter. The flashing must be made of corrosion-resistant material and properly integrated with the step flashing above it.. Read more about Selecting the Best Roofing Material for Your Detached Studio or ADU in Cooper-Young.
Common water damage patterns in Cooper-Young bungalows
Through years of inspecting Cooper-Young homes, we’ve identified specific water damage patterns:
Wall rot near chimneys: Many bungalows have chimneys that intersect with the roof at a low pitch. Without kickout flashing, water accumulates at this junction and penetrates the wall.
Garage wall deterioration: Homes with attached garages often show water damage where the garage roof meets the main house wall. The lower roof creates a perfect scenario for water to run down the wall without proper diversion.
Second-story wall damage: In two-story bungalows, the roof-to-wall intersection on upper levels is often overlooked, leading to water traveling down through the wall cavity to the first floor.
Step-by-step kickout flashing installation process
- Remove existing siding or stucco
Carefully remove the siding or stucco in the area where the kickout flashing will be installed to expose the wall sheathing and existing flashing.
- Install building paper or house wrap
Apply self-adhering building paper or house wrap that extends at least 6 inches above and below the flashing area to create a moisture barrier.
- Install the kickout flashing
Slide the kickout flashing under the existing step flashing and secure it to the wall with corrosion-resistant nails. The bottom edge should extend into the gutter.
- Integrate with step flashing
Install step flashing pieces that overlap the kickout flashing by at least 2 inches, creating a shingled effect that directs water downward.
- Seal and weatherproof
Apply high-quality, UV-resistant sealant at all joints and ensure the flashing is properly integrated with the roof underlayment.
- Reinstall siding or stucco
Carefully reinstall the siding or stucco, ensuring it does not cover the top edge of the kickout flashing.
Materials and tools for proper kickout flashing
Professional installation requires specific materials:
| Material | Specification | Purpose |
|---|---|---|
| Kickout flashing | 28-gauge galvanized steel or copper | Main water diversion component |
| Step flashing | Same material as kickout | Creates water-shedding layers |
| Sealant | Polyurethane or silicone | Waterproofs joints and seams |
| Building paper | Self-adhering membrane | Creates moisture barrier |
| Nails | Galvanized roofing nails | Secures flashing without rust |
Common installation mistakes to avoid
Even experienced contractors make these errors that compromise the effectiveness of kickout flashing:
- Incorrect angle: The kickout portion must extend far enough to direct water into the gutter, not just away from the wall
- Poor integration: Failing to properly integrate the kickout with step flashing above it creates gaps where water can penetrate
- Improper sealing: Using the wrong type of sealant or applying it incorrectly allows water to seep behind the flashing
- Short length: Kickout flashing that doesn’t extend high enough up the wall fails to protect the critical area where water can enter
In Cooper-Young’s historic homes, another common mistake is failing to account for the existing moisture conditions. Older homes often have compromised sheathing or insulation that requires additional moisture management strategies beyond just installing new flashing.
The cost of neglect: real examples from Cooper-Young
We recently inspected a 1920s bungalow on Young Avenue where the homeowner noticed a small water stain on their living room ceiling. Investigation revealed that water had been entering through a missing kickout flashing for years, causing:
- $8,000 in structural repairs to replace rotted wall studs and sheathing
- $3,500 in mold remediation to address black mold growth in the wall cavity
- $2,200 in ceiling and wall repairs after removing damaged drywall
The total cost: $13,700. The cost to install proper kickout flashing initially: approximately $500. The difference is staggering.
Another case on Cooper Street involved a homeowner who tried to install kickout flashing themselves. They used aluminum flashing that corroded within two years, causing even more damage than if no flashing had been installed. Professional installation with proper materials would have cost $600; the resulting damage cost over $9,000 to repair. EPA mold information.
Insurance implications and coverage limitations
Many Cooper-Young homeowners are surprised to learn that water damage from missing or improperly installed kickout flashing may not be covered by their homeowner’s insurance. Most policies cover sudden, accidental damage but exclude damage from:
- Maintenance issues (like missing flashing)
- Gradual water intrusion over time
- Damage that could have been prevented with proper maintenance
This is why professional inspection and installation is critical. Insurance companies may require documentation showing that flashing was installed according to current building codes, especially in historic districts where there may be additional requirements.
Frequently Asked Questions
How long does kickout flashing installation take?
Most kickout flashing installations in Cooper-Young homes take 2-4 hours for a single location. Complex installations involving extensive water damage repair can take 1-2 days. Get a Fast Quote for Roof Leak Repair in Cordova.
Can I install kickout flashing myself?
While DIY installation is possible, professional installation ensures proper integration with existing roofing materials and compliance with Memphis building codes. Improper installation can cause more damage than no flashing at all. Roofing Lakeland.
How much does kickout flashing installation cost?
Professional installation typically costs $400-$800 per location in Cooper-Young, depending on accessibility and whether siding or stucco needs to be removed and replaced.
How long should kickout flashing last?
Quality kickout flashing installed properly should last 30-50 years, matching or exceeding the lifespan of your roof. Copper flashing can last even longer, potentially over 100 years.
Call (901) 669-7399 today to schedule your inspection
Don’t wait until water damage becomes visible. A professional inspection can identify missing or damaged kickout flashing before it causes thousands of dollars in repairs. Our experienced team understands the unique challenges of Cooper-Young’s historic bungalows and can recommend the right solution for your home. Flat Roof Repair & Restoration.
Pick up the phone and call (901) 669-7399 before the next storm hits. Early detection and proper installation can save you from costly repairs and protect your home’s structural integrity for decades to come.
Evergreen Roofing Memphis serves Cooper-Young and all surrounding Memphis neighborhoods with expert roofing services backed by years of local experience and a commitment to quality workmanship.. Read more about Choosing the Perfect Roofing Style for Your Craftsman Bungalow in Midtown.
You may also find this helpful. Managing Massive Oak Tree Debris and Leaf Clogs on Your River Oaks Roof.
{
“@context”: “https://schema.org”,
“@type”: “BlogPosting”,
“headline”: “Why kickout flashing is the one thing standing between your Cooper-Young bungalow and major water damage”,
“description”: “Learn how kickout flashing prevents water damage in Cooper-Young bungalows. Find out the critical installation steps and why this small component protects your home from costly repairs.”,
“wordCount”: 1553,
“datePublished”: “2026-05-27T11:49:00.000Z”,
“dateModified”: “2026-05-27T11:49:00.000Z”,
“inLanguage”: “en-US”,
“mainEntityOfPage”: {
“@type”: “WebPage”,
“@id”: “https://evergreenroofingmemphis.com”
},
“publisher”: {
“@type”: “LocalBusiness”,
“name”: “Evergreen Roofing Memphis”,
“url”: “https://evergreenroofingmemphis.com”
},
“author”: {
“@type”: “Organization”,
“name”: “Evergreen Roofing Memphis”,
“url”: “https://evergreenroofingmemphis.com”
},
“image”: {
“@type”: “ImageObject”,
“url”: “https://evergreenroofingmemphis.com/wp-content/uploads/2026/03/why-kickout-flashing-is-the-one-thing-standing-bet-1.png”
}
}
{
“@context”: “https://schema.org”,
“@type”: “RoofingContractor”,
“name”: “Evergreen Roofing Memphis”,
“url”: “https://evergreenroofingmemphis.com”,
“address”: {
“@type”: “PostalAddress”,
“addressLocality”: “Memphis”
},
“areaServed”: {
“@type”: “City”,
“name”: “Memphis”
}
}
{
“@context”: “https://schema.org”,
“@type”: “FAQPage”,
“mainEntity”: [
{
“@type”: “Question”,
“name”: “How long does kickout flashing installation take?”,
“acceptedAnswer”: {
“@type”: “Answer”,
“text”: “Most kickout flashing installations in Cooper-Young homes take 2-4 hours for a single location. Complex installations involving extensive water damage repair can take 1-2 days. Get a Fast Quote for Roof Leak Repair in Cordova.”
}
},
{
“@type”: “Question”,
“name”: “Can I install kickout flashing myself?”,
“acceptedAnswer”: {
“@type”: “Answer”,
“text”: “While DIY installation is possible, professional installation ensures proper integration with existing roofing materials and compliance with Memphis building codes. Improper installation can cause more damage than no flashing at all. Roofing Lakeland.”
}
},
{
“@type”: “Question”,
“name”: “How much does kickout flashing installation cost?”,
“acceptedAnswer”: {
“@type”: “Answer”,
“text”: “Professional installation typically costs $400-$800 per location in Cooper-Young, depending on accessibility and whether siding or stucco needs to be removed and replaced.”
}
},
{
“@type”: “Question”,
“name”: “How long should kickout flashing last?”,
“acceptedAnswer”: {
“@type”: “Answer”,
“text”: “Quality kickout flashing installed properly should last 30-50 years, matching or exceeding the lifespan of your roof. Copper flashing can last even longer, potentially over 100 years.”
}
}
]
}
{
“@context”: “https://schema.org”,
“@type”: “HowTo”,
“name”: “How to install kickout flashing”,
“step”: [
{
“@type”: “HowToStep”,
“position”: 1,
“name”: “Remove existing siding or stucco”,
“text”: “Carefully remove the siding or stucco in the area where the kickout flashing will be installed to expose the wall sheathing and existing flashing.”
},
{
“@type”: “HowToStep”,
“position”: 2,
“name”: “Install building paper or house wrap”,
“text”: “Apply self-adhering building paper or house wrap that extends at least 6 inches above and below the flashing area to create a moisture barrier.”
},
{
“@type”: “HowToStep”,
“position”: 3,
“name”: “Install the kickout flashing”,
“text”: “Slide the kickout flashing under the existing step flashing and secure it to the wall with corrosion-resistant nails. The bottom edge should extend into the gutter.”
},
{
“@type”: “HowToStep”,
“position”: 4,
“name”: “Integrate with step flashing”,
“text”: “Install step flashing pieces that overlap the kickout flashing by at least 2 inches, creating a shingled effect that directs water downward.”
},
{
“@type”: “HowToStep”,
“position”: 5,
“name”: “Seal and weatherproof”,
“text”: “Apply high-quality, UV-resistant sealant at all joints and ensure the flashing is properly integrated with the roof underlayment.”
},
{
“@type”: “HowToStep”,
“position”: 6,
“name”: “Reinstall siding or stucco”,
“text”: “Carefully reinstall the siding or stucco, ensuring it does not cover the top edge of the kickout flashing.”
}
],
“image”: “https://evergreenroofingmemphis.com/wp-content/uploads/2026/03/why-kickout-flashing-is-the-one-thing-standing-bet-1.png”
}
{
“@context”: “https://schema.org”,
“@type”: “BreadcrumbList”,
“itemListElement”: [
{
“@type”: “ListItem”,
“position”: 1,
“name”: “Home”,
“item”: “https://evergreenroofingmemphis.com”
},
{
“@type”: “ListItem”,
“position”: 2,
“name”: “Blog”,
“item”: “https://evergreenroofingmemphis.com/blog”
},
{
“@type”: “ListItem”,
“position”: 3,
“name”: “Why kickout flashing is the one thing standing between your Cooper-Young bungalow and major water damage”
}
]
}
{
“@context”: “https://schema.org”,
“@type”: “Service”,
“serviceType”: “Roofing”,
“provider”: {
“@type”: “LocalBusiness”,
“name”: “Evergreen Roofing Memphis”,
“url”: “https://evergreenroofingmemphis.com”
},
“areaServed”: {
“@type”: “City”,
“name”: “Memphis”
},
“description”: “Learn how kickout flashing prevents water damage in Cooper-Young bungalows. Find out the critical installation steps and why this small component protects your home from costly repairs.”
}